
A broken tail light cover can be a real hassle. It not only looks bad but can also lead to fines.
Finding a quick, temporary fix is crucial. Driving with a damaged tail light cover is unsafe and illegal in many places. You need a solution that can hold until you get a proper repair. This guide will provide you with simple, effective methods to temporarily fix your broken tail light cover.
These fixes are easy to apply and require minimal tools. Whether you’re on a tight budget or in a hurry, you’ll find practical options here. Let’s dive in and get your tail light cover back in shape.
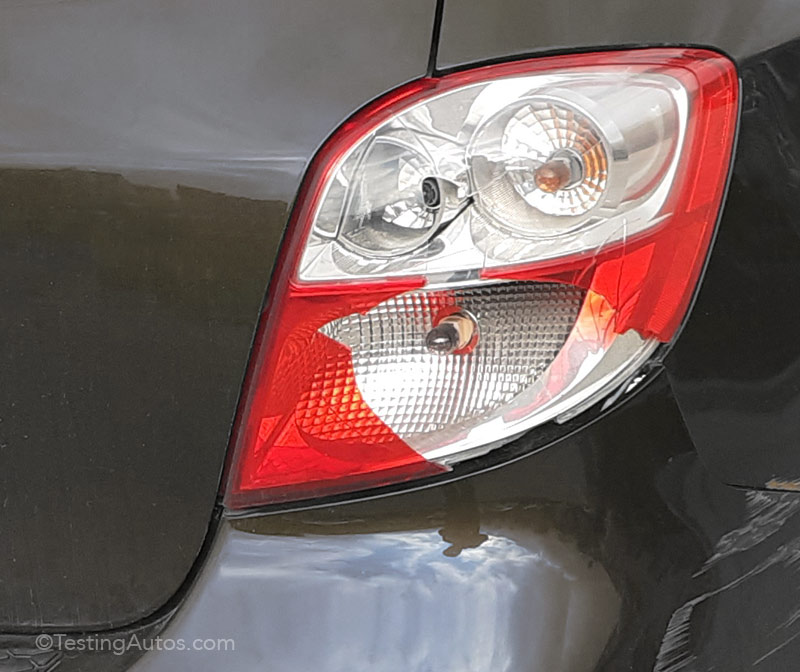
Credit: www.testingautos.com
Assessing The Damage
Before attempting a temporary fix for your broken tail light cover, it’s crucial to assess the damage. This initial step will help you understand the severity of the issue and determine the best course of action. Here’s how you can go about it:
Identifying The Severity
Examine the broken tail light cover closely. Look for cracks, missing pieces, or any signs of extensive damage. A small crack may only need a simple fix. A larger break might require more attention. Identifying the severity will guide your repair process.
Safety Considerations
Safety should be your top priority when assessing the damage. Ensure the vehicle is parked in a safe location. Turn off the engine and lights. Wear gloves to protect your hands from sharp edges. If the damage is severe, consider seeking professional help.
Gathering Necessary Supplies
Fixing a broken tail light cover doesn’t need to be difficult. Start by gathering the right supplies. This will save time and make the repair smoother. Below, we’ll discuss the tools and materials required and where to find them.
Tools And Materials
You need some basic tools and materials. First, get a screwdriver. It will help you remove screws from the tail light assembly. A pair of gloves is also essential for safety. A plastic adhesive or tape is needed to hold the cover in place. Finally, get a cloth to clean the area before applying the fix.
Where To Find Supplies
Most supplies are available at local hardware stores. You can also check automotive stores for specific items like plastic adhesive. If you prefer online shopping, websites like Amazon or eBay offer a wide range of these supplies. Some stores offer same-day delivery for urgent repairs.
Cleaning The Area
Cleaning the area around your broken tail light cover is essential. A clean surface ensures that any temporary fix adheres properly. Let’s break down the steps to clean the area effectively.
Removing Debris
First, you need to remove any debris. Use a soft brush or cloth. Gently sweep away any dirt or loose pieces. Be thorough but gentle. You don’t want to cause more damage.
Ensuring A Dry Surface
Next, ensure the area is completely dry. Moisture can hinder the effectiveness of the fix. Use a clean, dry cloth to wipe the surface. Check for any remaining moisture. If needed, you can let it air dry for a few minutes.

Credit: www.youtube.com
Using Tape For Quick Fix
A broken tail light cover can be a hassle. A quick and easy solution is to use tape. This method is affordable and simple, and it ensures you stay safe on the road until you get a proper fix. Let’s dive into the details of using tape for a quick fix of your broken tail light cover.
Types Of Tape
Different types of tape work for this temporary fix. Here are some options:
- Duct Tape: Strong and durable. It withstands harsh weather conditions.
- Electrical Tape: Flexible and water-resistant. It adheres well to plastic surfaces.
- Red Lens Repair Tape: Specifically designed for tail lights. It matches the color of your tail light.
Applying The Tape
Follow these steps to apply tape to your broken tail light cover:
- Clean the Area: Use a damp cloth to clean the broken area. This removes dirt and ensures the tape sticks well.
- Cut the Tape: Cut the tape into pieces. Make sure they are large enough to cover the broken section.
- Apply the Tape: Start by applying one piece of tape over the broken area. Press firmly to ensure it sticks.
- Layer the Tape: For extra strength, apply additional layers of tape. Overlap each piece slightly.
This method provides a temporary solution. It keeps the broken area covered and prevents further damage. Ensure you get a proper fix soon to avoid any issues.
Plastic Wrap Method
A broken tail light cover can be a hassle. It not only affects the look of your car but also its safety. The Plastic Wrap Method is a quick and easy fix. It provides a temporary solution until you can replace the cover. Here’s how you can use plastic wrap to protect your tail light.
Choosing The Right Wrap
First, pick the right plastic wrap. Look for a durable and thick wrap. The wrap should withstand rain and wind. Avoid thin or cheap plastic. They tear easily and won’t last. Grocery store plastic wrap can work in a pinch. But, heavy-duty wrap is better.
Securing The Wrap
To start, clean the broken tail light cover. Remove any loose pieces. Dry the area completely. Next, cut a piece of plastic wrap. It should cover the entire tail light. Place the wrap over the broken area. Make sure it fits snugly.
Use clear tape to secure the edges. Start with the top and bottom. Then, tape the sides. Make sure the wrap is tight. There should be no loose edges. Double-check for gaps. The wrap should stay in place, even while driving.

Credit: www.youtube.com
Using A Temporary Lens Cover
A broken tail light cover can be a headache. It’s not just about aesthetics. It’s a safety concern. Using a temporary lens cover can help you stay safe and legal. Here are a few methods you can use.
Commercial Products
Several commercial products are available for temporary tail light repairs. These products are easy to use. They provide a quick fix until you can get a permanent replacement.
| Product | Description | Price |
|---|---|---|
| Red Lens Repair Tape | Durable, weather-resistant tape for tail light repairs. | $5 – $10 |
| Temporary Tail Light Cover | Pre-cut adhesive cover for quick fixes. | $10 – $20 |
These products are available at most auto parts stores. They are a simple solution to keep you safe on the road.
Diy Alternatives
If you prefer a DIY approach, there are several options. These methods require items you likely have at home. They may not be as durable as commercial products, but they can work in a pinch.
- Clear Packing Tape: Use clear packing tape to cover the broken area. It provides a temporary shield and keeps moisture out.
- Red Cellophane: Cut a piece of red cellophane to fit the broken area. Secure it with clear tape. This mimics the red lens of a tail light.
- Plastic Bottle: Cut a red plastic bottle to fit the broken cover. Attach it with tape. This can provide a more rigid fix.
These DIY methods can be useful in emergencies. They offer a temporary solution until you can replace the broken cover.
Ensuring Visibility
A broken tail light cover can pose a serious risk. Ensuring visibility is crucial for your safety and others on the road. With a temporary fix, you can keep your car visible until you get a permanent repair. This section will guide you through the process of checking light functionality and understanding legal requirements.
Checking Light Functionality
First, ensure your tail light works. Turn on your car and test the lights. Check both the brake lights and the regular tail lights. If any light is out, replace the bulb immediately. A functional light is more important than a cover.
Next, inspect the broken cover. Remove any loose pieces. Clean the area around the break. This helps the temporary fix to stick better. Use a clear tape or red tape as a temporary cover. This will help maintain visibility.
Legal Requirements
Each region has different laws about tail lights. Ensure you know your local regulations. In many places, a broken tail light cover can lead to a fine. Some regions require a red cover, while others may allow clear tape.
Consult your local vehicle code. This information is often available online. Knowing the laws can save you trouble. A temporary fix should follow these rules. This ensures you stay compliant until you get a permanent repair.
Planning For Permanent Repair
A temporary fix for a broken tail light cover is just that—temporary. To ensure the safety and legality of your vehicle, it’s crucial to plan for a permanent repair. This involves a few key steps, including scheduling a professional fix and purchasing a replacement. Let’s explore these steps in detail.
Scheduling A Professional Fix
Once you have a temporary fix in place, it’s time to schedule a professional repair. A certified mechanic can replace the broken tail light cover and ensure everything is in working order.
To find a reputable mechanic, ask friends or check online reviews. You can also visit your car’s dealership for expert service. Call ahead to book an appointment and inquire about the costs involved.
Here’s a simple checklist to follow:
- Find a certified mechanic or dealership
- Check reviews or ask for recommendations
- Call to book an appointment
- Inquire about the cost and time required
Purchasing A Replacement
Before your appointment, you may need to purchase a replacement tail light cover. Make sure to buy the correct part for your vehicle’s make and model.
You can buy replacement parts from:
- Auto parts stores
- Online retailers
- Car dealerships
When purchasing online, read product reviews and check the return policy. A simple table can help you keep track of your options:
| Source | Pros | Cons |
|---|---|---|
| Auto Parts Store | Immediate availability | May cost more |
| Online Retailer | Often cheaper | Shipping time |
| Car Dealership | Expert advice | Higher prices |
Make sure to keep your receipt and any warranty information. This will help if you need to return or exchange the part.
Frequently Asked Questions
How To Temporarily Fix A Broken Tail Light Cover?
You can use red tape for a quick fix. Clean the area first, then apply the tape over the broken section.
Is It Safe To Drive With A Broken Tail Light Cover?
Driving with a broken cover is unsafe. It can reduce visibility. Use a temporary fix until you get a replacement.
Can I Use Clear Tape For A Tail Light Cover?
Clear tape is not recommended. It doesn’t match the red lens, which can confuse other drivers. Use red tape instead.
How Long Can A Temporary Fix Last?
A temporary fix is just that—temporary. It should only last a few days until you can get a proper replacement.
Conclusion
Fixing a broken tail light cover is quick and easy. Follow the steps provided. It will save you time and money. Keep safety in mind. Temporary fixes help until you can get a proper repair. Your car stays roadworthy. Don’t delay in making the permanent repair.
A well-maintained car is crucial. Safe driving is always a priority. Take care of minor issues promptly. This ensures a smoother ride. Thanks for reading and drive safely!


