
A broken tail light plastic can be a major headache. It can cause safety issues and attract fines.
Fixing it yourself is easier than you might think. Tail lights are essential for safe driving. They signal your intentions to other drivers. A damaged tail light can lead to accidents. It can also get you a traffic ticket. Fixing broken tail light plastic at home saves you money.
It is a simple process if you have the right tools and know-how. This guide will help you through each step. With clear instructions and some patience, you can fix it yourself. Read on to learn how to make your tail light look new again.
Gather Necessary Tools And Materials
Before starting the repair of your broken tail light plastic, it’s crucial to gather all the necessary tools and materials. This ensures a smooth and efficient process without any interruptions. Having everything prepared will save you time and effort.
Tools Needed
To fix your tail light plastic, you’ll need some basic tools. Here is a list of essential tools:
- Screwdriver set
- Plastic trim remover
- Utility knife
- Heat gun
- Clean cloth
These tools help you remove the broken plastic and prepare the area for repairs. Make sure you have them on hand before starting the process.
Materials Required
Besides tools, you’ll need specific materials to complete the repair. Here’s what you’ll need:
- Replacement tail light cover
- Epoxy glue
- Plastic bonding adhesive
- Sandpaper
- Masking tape
These materials ensure a strong and durable repair. The replacement cover is the most critical item. Choose one that matches your vehicle’s make and model.
Safety Precautions
Repairing a broken tail light plastic can be dangerous if not done correctly. Safety should always be your top priority. Here are some crucial safety precautions to follow before you start the repair process.
Protective Gear
Always wear protective gloves to shield your hands from sharp edges. Goggles are essential to protect your eyes from flying debris. A long-sleeve shirt can help protect your arms. Ensure you have sturdy shoes to protect your feet from heavy objects.
Safe Work Environment
Choose a well-lit area for your work. Ensure there are no flammable materials nearby. Keep the workspace clean and free of clutter. Make sure your vehicle is on a flat surface to prevent it from moving. Use wheel chocks if necessary.
Remove The Broken Tail Light
Fixing a broken tail light may seem daunting, but it is manageable. The first step is to remove the broken tail light. This process involves a few essential steps that you need to follow carefully.
Access The Tail Light
The initial step is to access the tail light. Open your vehicle’s trunk or tailgate to gain access. Locate the area where the tail light assembly is housed. This area is typically covered by a plastic panel or carpeting.
Remove any covering or insulation. Use a flathead screwdriver or trim removal tool if needed. Gently pry off the panel to expose the tail light assembly. Be careful not to damage the covering or surrounding areas.
Unfasten Screws And Clips
The next step involves unfastening screws and clips that secure the tail light. Use the appropriate screwdriver or socket wrench to remove these fasteners. Keep the screws and clips in a safe place to avoid losing them.
- Locate all screws and clips holding the tail light.
- Unscrew each one carefully.
- Place screws and clips in a container for safekeeping.
Once all fasteners are removed, gently pull the tail light assembly out. Disconnect any electrical connectors attached to the tail light. Press the release tabs to disconnect these connectors safely.
With the assembly removed, you are now ready to proceed with repairing or replacing the broken tail light plastic.
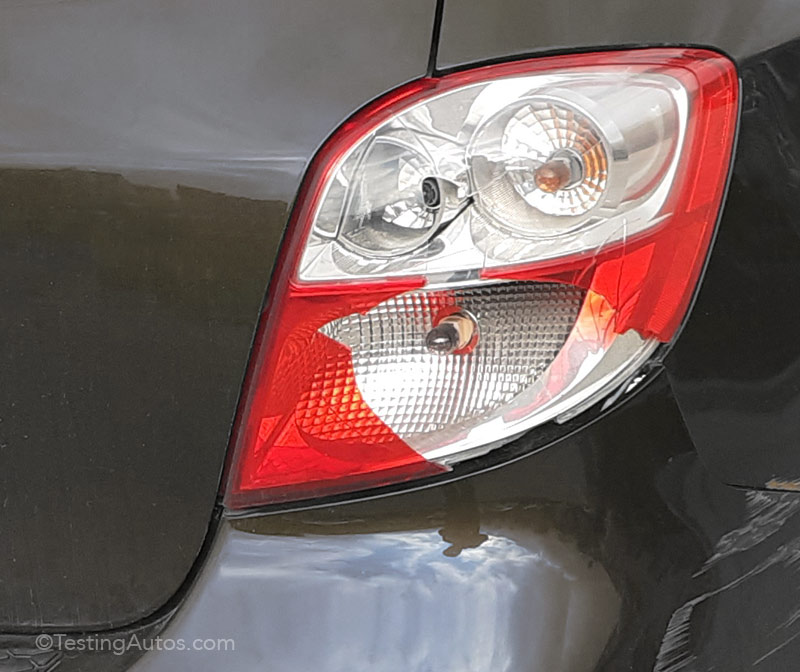
Credit: www.testingautos.com
Clean The Area
Fixing a broken tail light plastic is easier than you think. One crucial step is to clean the area before starting any repairs. This ensures a smooth surface for the patch or adhesive. Follow these simple steps to achieve a clean working area.
Remove Debris And Dust
First, remove any large pieces of broken plastic. Use gloves to avoid cuts. Next, use a soft brush to sweep away small debris. Finally, take a cloth and wipe off all the dust. A clean surface is essential for a successful repair.
Prepare Surface For Repair
After removing debris and dust, you need to prepare the surface. Use a damp cloth to wipe the area again. This helps remove any remaining dirt. Let the area dry completely before applying any adhesive or patch. For a better bond, lightly sand the edges of the broken plastic. This creates a rough surface for the adhesive to grip.
| Step | Action | Tools Needed |
|---|---|---|
| 1 | Remove large debris | Gloves, soft brush |
| 2 | Wipe off dust | Cloth |
| 3 | Wipe with damp cloth | Cloth |
| 4 | Let dry | None |
| 5 | Lightly sand edges | Sandpaper |
These steps ensure your tail light repair will be durable and effective. Taking the time to clean the area properly makes a big difference.
Repair The Plastic
A broken tail light can be a pain. It looks bad and might get you a ticket. Fixing the plastic is easier than you think. You do not need to buy a new tail light. You can repair the plastic and save money. Follow these simple steps to fix it.
Apply Epoxy Or Plastic Weld
First, clean the broken area. Use soap and water. Dry it well. You need epoxy or plastic weld. These materials bond plastic well. Mix the epoxy or plastic weld as per instructions. Apply it to the broken edges. Press the pieces together. Hold them tight for a few minutes. Let the bond set. It might take an hour or more. Check the instructions for the exact time.
Smooth And Shape The Repair
The bond is strong now. But the repair might look rough. Use sandpaper to smooth it. Start with coarse sandpaper. Then use fine sandpaper for a smooth finish. If needed, apply more epoxy. Shape it to match the tail light. Sand again if required. The tail light should look as good as new.
Reinstall The Tail Light
Fixing a broken tail light plastic is half the job done. The next step is to reinstall the tail light. Proper reinstallation ensures the tail light functions well and stays in place. Follow these simple steps to fit the tail light back securely.
Fit The Tail Light Back
First, align the tail light with the car’s body. Make sure the connectors and wires are not twisted. Gently push the tail light into its slot. It should fit snugly without force.
Secure Screws And Clips
Once the tail light is in place, locate the screws and clips. Use a screwdriver to tighten the screws. Do not over-tighten, as this can damage the plastic. Ensure all clips are snapped in securely. Double-check that the tail light does not move.
Test The Repair
After fixing the broken tail light plastic, it is crucial to test the repair. This step ensures the repair was successful and that the tail light is functioning correctly. Follow these steps to test your repair thoroughly.
Check Tail Light Function
Turn on your car’s lights. Check if the tail light illuminates properly. Ensure the brake light and turn signal work. Each function must operate without flickering or dimming.
Inspect For Stability And Fit
Gently push on the repaired tail light. It should not move or wobble. Check the edges to ensure the plastic fits snugly. There should be no gaps or misalignment.
Credit: www.reddit.com

Credit: m.youtube.com
Frequently Asked Questions
How Do You Fix A Broken Tail Light?
To fix a broken tail light, remove the damaged plastic cover. Clean the area and replace the cover with a new one.
Can You Replace Just The Tail Light Cover?
Yes, you can replace just the tail light cover. Ensure it fits your vehicle’s make and model.
What Tools Do You Need To Fix A Tail Light?
You need a screwdriver, replacement tail light cover, and cleaning cloth. Follow the manufacturer’s instructions for best results.
How Much Does It Cost To Fix A Tail Light?
The cost varies. It typically ranges from $20 to $100. Prices depend on the vehicle and part quality.
Conclusion
Fixing a broken tail light plastic is easier than you think. Follow the steps carefully. Start by gathering the necessary tools and materials. Clean the area well before applying any adhesive. Secure the new plastic piece firmly. Allow proper drying time for the adhesive.
Finally, test your tail light to ensure it works perfectly. Regular maintenance can prevent future damage. By doing it yourself, you save time and money. Now, you can drive safely with a fixed tail light.


