
Fixing a pull chain light fixture may seem tricky. But it’s easier than you think.
This blog will guide you step-by-step. Pull chain light fixtures are common in many homes. Over time, they can wear out or break. Knowing how to fix them can save you money and hassle. In this guide, we’ll walk you through the tools you need and the steps to take.
You’ll learn how to safely repair or replace the pull chain mechanism. Whether you’re a beginner or handy with tools, this simple process will help you restore your light fixture. Let’s get started on bringing light back to your space!

Credit: www.familyhandyman.com
Gather Necessary Tools
Before you start fixing a pull chain light fixture, gather all the necessary tools. Having the right tools ensures a smooth and safe process. It also saves time and effort. Let’s look at the essential tools and safety equipment you need.
Essential Tools
You need a few basic tools to fix a pull chain light fixture. A screwdriver is crucial for loosening and tightening screws. Choose one that fits the screws on your fixture. A pair of pliers is also handy. It helps with gripping and pulling the chain. Don’t forget a wire stripper. It helps in cutting and stripping wires. You might also need a replacement pull chain if the old one is broken.
Safety Equipment
Safety is key when working with electrical fixtures. Wear safety gloves to protect your hands from electrical shocks. Use safety goggles to shield your eyes from dust and debris. Have a voltage tester on hand. It helps ensure there is no live current before you start working. Always turn off the power supply to the fixture at the circuit breaker. This step is crucial for your safety.
Credit: m.youtube.com
Turn Off Power
When fixing a pull chain light fixture, safety must be your top priority. The first step is to turn off the power. This prevents any risk of electric shock. Follow these simple instructions to ensure your safety before starting.
Locate Circuit Breaker
First, find your home’s circuit breaker panel. It’s usually in the basement, garage, or utility room. The panel contains switches that control power to different areas of your house.
Look for the switch that controls the room with the pull chain light fixture. The switches are often labeled, making it easier to find the right one. Turn the switch to the “off” position. This cuts off the electrical flow to the light fixture.
Verify Power Is Off
Next, confirm the power is off. This step is crucial. Use a non-contact voltage tester to check the wires in the light fixture. Hold the tester close to the wires. If the tester does not light up, the power is off.
If you don’t have a voltage tester, you can use a standard light switch. Try turning the light on and off. If it doesn’t work, the power is off. Now you can safely proceed with fixing the pull chain light fixture.
Remove Light Fixture Cover
Removing the light fixture cover is the first step to fix a pull chain light fixture. This process requires a bit of care and patience. The light fixture cover protects the bulb and the inner components. Follow these steps to ensure you do it correctly.
Unscrew Cover
Start by unscrewing the cover. Use a proper screwdriver or your hands, if possible. Turn off the power before you begin. This ensures safety and prevents electric shocks.
| Step | Action |
|---|---|
| 1 | Turn off the power |
| 2 | Locate screws on the cover |
| 3 | Use a screwdriver to unscrew |
| 4 | Gently remove the cover |
Handle Cover Carefully
Handle the cover with care. Light fixture covers are often made of glass. They can break easily if mishandled. Place the cover on a soft surface to avoid damage. Do not rush; take your time to ensure the cover is safely removed.
- Turn off the power first
- Hold the cover with both hands
- Set the cover on a soft surface
- Check for any damage or cracks
Once the cover is removed, you can proceed to the next steps. This includes inspecting the pull chain mechanism. Ensure all parts are intact and functional.

Credit: m.youtube.com
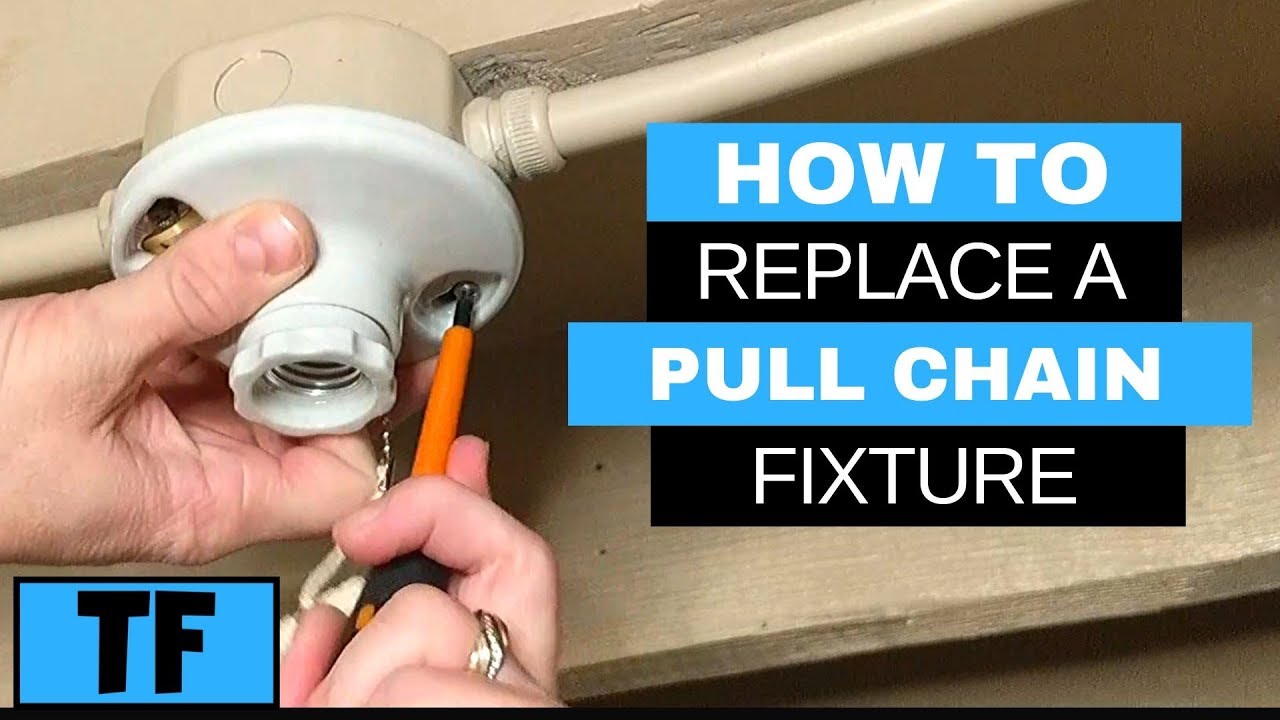
Detach Pull Chain Mechanism
Fixing a pull chain light fixture can seem daunting. But with the right steps, it’s manageable. First, you’ll need to detach the pull chain mechanism. This involves identifying the pull chain and disconnecting the wires. Follow these steps for a smooth process.
Identify Pull Chain
Locate the pull chain on your light fixture. It usually hangs down from the fixture. Check if the chain moves freely. If not, the mechanism may be jammed. Identify where the pull chain connects to the fixture. This helps in the next steps.
Disconnect Wires
Ensure the power is off before touching any wires. Use a screwdriver to remove the light fixture cover. You’ll see wires connected to the pull chain mechanism. Carefully disconnect these wires. Note their positions for reassembly. Ensure wires do not touch each other. This prevents any electrical hazards.
Install New Pull Chain
Replacing a pull chain light fixture can seem daunting. It’s not as complex as it appears. By following a few simple steps, anyone can get the job done. The first crucial step is to install a new pull chain. This will restore functionality to your fixture and ensure it works seamlessly.
Attach New Chain
Begin by attaching the new chain to the pull switch. Ensure it fits snugly into the switch mechanism. This connection is vital for smooth operation. Here’s a simple guide:
- Remove the old chain from the switch.
- Insert the new chain into the switch opening.
- Test the chain by pulling it to ensure it moves freely.
If the chain doesn’t move easily, adjust its position. Make sure it’s securely attached but not too tight.
Secure Wires
Next, focus on securing the wires. This step is crucial for safety. Improper wiring can lead to hazards. Follow these steps:
- Turn off the power to the light fixture.
- Locate the wires connected to the pull switch.
- Disconnect the old wires from the switch.
- Connect the new wires to the switch terminals.
- Use wire nuts to secure the connections.
Once the wires are secure, turn the power back on. Test the light fixture to ensure it works correctly. If the light doesn’t turn on, check the wire connections again. Ensure they are tight and properly connected.
Following these steps will help you install a new pull chain and secure the wires correctly. Your light fixture should now operate smoothly.
Reassemble Light Fixture
Once you have fixed the pull chain mechanism, it is time to reassemble the light fixture. This step is crucial to ensure the fixture functions properly and looks neat. Follow these simple steps to reassemble your light fixture efficiently.
Replace Fixture Cover
First, carefully place the fixture cover back over the light. Align it with the screw holes on the fixture base. Make sure the pull chain hangs freely through the designated hole in the cover.
Tighten Screws
Next, use a screwdriver to tighten the screws that secure the cover to the fixture. Turn the screws clockwise until they are snug but do not over-tighten to avoid damaging the fixture or the cover.
Here is a simple table to summarize the steps:
| Step | Action |
|---|---|
| 1 | Align fixture cover with base |
| 2 | Ensure pull chain hangs freely |
| 3 | Tighten screws clockwise |
By following these steps, your light fixture should be securely reassembled and ready for use.
Restore Power
Restoring power to your pull chain light fixture is crucial. This ensures your light operates smoothly. Follow these steps to safely restore power.
Flip Circuit Breaker
First, locate your home’s circuit breaker panel. It is usually in the basement, garage, or utility room.
Open the panel and find the switch labeled for your light fixture. Switch it to the “off” position. Wait for a few seconds, then flip it back to the “on” position.
This process resets the circuit, which helps restore power to your light fixture.
Test Light Fixture
After resetting the circuit breaker, it’s time to test the light fixture. Gently pull the chain to see if the light turns on.
If the light still doesn’t work, you might need to check the bulb. Try replacing it with a new one. If the light works with the new bulb, then the old bulb was faulty.
In case the light still doesn’t turn on, there might be an issue with the wiring or the fixture itself.
Always ensure power is off before inspecting wiring. This avoids any risk of electric shock.
Troubleshooting Tips
Having trouble with your pull chain light fixture? This guide will help you solve common issues and provide additional repair tips. Follow these troubleshooting steps to get your light working again.
Common Issues
Pull chain light fixtures can face several common issues. Here are some frequent problems and simple solutions:
- Chain not pulling: The chain might be tangled or stuck. Ensure the chain is free to move.
- Light not turning on: Check the bulb. It could be burned out or not screwed in properly.
- Chain detached: If the chain is broken or detached, you need to replace it.
Additional Repairs
Some issues may require more detailed repairs. Here are some additional tips:
- Replace the switch: If the light still doesn’t work, the switch might be faulty. Turn off the power, remove the fixture, and replace the switch.
- Check wiring: Loose or damaged wires can cause issues. Ensure all wires are secure and in good condition.
- Install a new fixture: If all else fails, consider installing a new pull chain light fixture.
Fixing a pull chain light fixture can be simple. Follow these troubleshooting tips to identify and resolve common issues.
Frequently Asked Questions
How Do You Fix A Pull Chain Light Switch?
To fix a pull chain light switch, first, turn off the power. Remove the fixture cover and locate the switch. Replace the broken chain or switch with a new one. Reassemble the fixture and test.
Why Does A Pull Chain Light Stop Working?
A pull chain light can stop working due to a broken chain, faulty switch, or loose connections. Inspect the components and replace or repair as needed.
Can I Replace A Pull Chain With A Switch?
Yes, you can replace a pull chain with a wall switch. Turn off the power, remove the fixture, and install a wall switch according to the manufacturer’s instructions.
How Do I Know If My Light Fixture Is Bad?
Check if the light bulb is functional. If it is, inspect the wiring and switch. If the fixture still doesn’t work, it might be faulty.
Conclusion
Fixing a pull chain light fixture can be simple. Follow the steps carefully. Gather your tools and turn off the power. Replace the faulty chain or switch. Test the fixture once repaired. Enjoy a working light again. Always prioritize safety.
Call a professional if unsure. Regular maintenance keeps fixtures in good shape. Save time and money with these tips.


