
Fixing a busted tail light is easier than you think. You don’t need to be a mechanic.
A busted tail light can be a headache, but it’s a fixable problem. Driving with a damaged tail light is unsafe and can get you a ticket. Fixing it yourself saves money and time. This guide will show you the steps to repair it.
You will need a few tools and some patience. By the end, your tail light will be as good as new. Ready to get started? Let’s dive into the process of fixing your busted tail light.
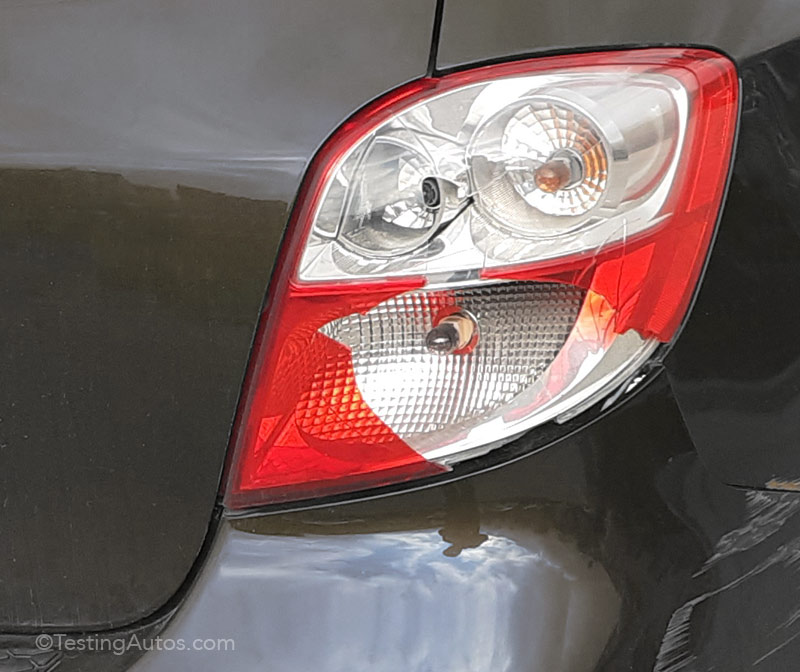
Credit: www.testingautos.com
Gather Necessary Tools
Before you start fixing your busted tail light, it’s important to gather the necessary tools. Having all the tools at hand makes the process smoother and quicker. This section will guide you on the basic tools you need and any special equipment that might be required.
Basic Tools Required
To fix a busted tail light, you will need a few basic tools. These tools are usually available in most households:
- Screwdriver (Phillips or flathead, depending on your car)
- Pliers (for gripping and twisting)
- Socket wrench set (for removing nuts and bolts)
- Replacement bulbs (check your car’s manual for the correct type)
- Clean cloth (to wipe any dirt around the area)
Special Equipment
In some cases, you might need special equipment to complete the task:
| Equipment | Purpose |
|---|---|
| Trim removal tool | For removing any plastic trim around the tail light. |
| Multimeter | To test the electrical connections and ensure there are no faults. |
| Wire stripper | For stripping any wires if you need to replace connectors. |
Having these tools ready will help you fix your tail light efficiently. Remember to check your car’s manual for any specific requirements.
Safety Precautions
Ensuring your safety is crucial when fixing a busted tail light. Taking the right precautions can prevent accidents and injuries. This section will guide you through essential safety measures.
Working In A Safe Environment
Choose a well-lit area to work on your vehicle. Ensure the ground is flat and stable to avoid slipping. If you must work in a garage, keep the door open for ventilation. Always turn off your car’s engine before starting any repairs.
Protective Gear
Wear gloves to protect your hands from sharp edges. Safety glasses are essential to shield your eyes from debris. Use closed-toe shoes to protect your feet from falling objects. Consider wearing long sleeves to avoid cuts and abrasions.
Remove The Damaged Tail Light
Fixing a busted tail light starts with removing the damaged one. This process is straightforward if you follow the steps closely. Below, we break down the steps to help you replace your tail light easily. Let’s get started with accessing the tail light and disconnecting the electrical connections.
Accessing The Tail Light
First, open your car’s trunk or rear hatch. This gives you access to the tail light assembly. You may need to remove some interior panels or covers. These panels are usually held in place by screws or clips. Use a screwdriver or panel removal tool.
Here’s a simple table to guide you:
| Tool | Purpose |
|---|---|
| Screwdriver | Remove screws |
| Panel removal tool | Remove clips |
Once you remove the panels, you can see the tail light assembly. It’s usually secured with more screws or nuts. Remove these fasteners carefully.
Disconnecting Electrical Connections
Now, disconnect the electrical connections. Find the wiring harness attached to the tail light. Press the release tab on the connector. Pull the connector away from the tail light assembly. Do not pull on the wires.
To summarize:
- Locate the wiring harness.
- Press the release tab.
- Pull the connector.
After disconnecting the electrical connections, you can remove the damaged tail light. Keep the screws and fasteners in a safe place. You’ll need them for the new tail light.

Credit: www.youtube.com
Install The New Tail Light
Installing a new tail light is a straightforward process. It is essential for vehicle safety. Follow these steps to ensure your tail light works properly. Let’s get started with the installation of the new tail light.
Connecting Electrical Wires
Begin by locating the electrical connector. It is usually near the tail light assembly. Carefully disconnect the old tail light’s wires. Make sure to remember their placement. This will help when you connect the new tail light.
Next, take the new tail light. Connect its wires to the matching wires on the car. Ensure each wire is securely connected. Loose connections can cause the light to malfunction.
Securing The Tail Light Assembly
After connecting the wires, position the new tail light assembly. Align it with the mounting holes. Secure the tail light with screws or bolts. Make sure it is tightly fastened to the vehicle.
Check for any gaps or misalignment. The tail light should sit flush with the car’s body. A properly installed tail light will prevent water and dirt from entering.
Once you have secured the tail light, test it. Turn on your car’s lights. Ensure the new tail light functions correctly. If it does, you have successfully installed your new tail light.
Test The New Tail Light
Once you have installed your new tail light, it’s crucial to ensure it works correctly. Testing the new tail light helps you confirm that the installation was successful. This step is essential for your safety and for avoiding potential fines.
Checking Light Functionality
Start by turning on your vehicle. Ask a friend to help if needed. Check if the tail light illuminates when you switch on your headlights. Press the brake pedal and ensure the brake light functions. Turn on your turn signals and hazard lights. Verify that the tail light responds appropriately.
Ensuring Proper Alignment
Inspect the alignment of the new tail light. Make sure it fits snugly in its place. There should be no gaps between the light and the car body. Misalignment can lead to moisture entering the light, causing damage. Adjust the tail light if necessary to ensure a perfect fit.
Troubleshooting Issues
Fixing a busted tail light can seem simple, but sometimes issues arise. Troubleshooting these issues ensures the repair is effective and long-lasting. Below, explore common problems and how to resolve them.
Common Installation Problems
One common issue is a loose bulb. This can cause the tail light to flicker or not work at all. Ensure the bulb is seated correctly in the socket. Another problem is using the wrong bulb type. Double-check the car manual to ensure compatibility.
Faulty wiring is another issue. Damaged wires can prevent the light from working. Inspect the wiring for any visible signs of wear. Lastly, check the fuse. A blown fuse can stop the tail light from working. Replace it if necessary.
How To Resolve Issues
Start by checking the bulb. Make sure it is the correct type and fitted properly. If the bulb is fine, inspect the wiring. Look for any damage or loose connections. Repair or replace damaged wires as needed.
If the wiring is intact, check the fuse box. Locate the fuse for the tail light and inspect it. Replace the fuse if it is blown. These steps should resolve most tail light issues.
Maintenance Tips
Maintaining your tail lights can prevent accidents and save you money. Regular maintenance ensures your tail lights are always functional and bright. Below are some essential tips to keep your tail lights in top shape.
Regular Inspections
Inspect your tail lights every few weeks. Look for cracks, moisture, or dim lighting. These inspections help you catch issues before they become serious problems. Check for burnt-out bulbs and replace them promptly.
- Check for cracks and damage
- Ensure no moisture inside the light
- Verify all bulbs are functioning
Cleaning And Care
Clean your tail lights regularly to keep them shining bright. Dirt and grime can reduce visibility and make your car less safe.
- Use a soft cloth and mild soap to clean the surface.
- Wipe off any residue with a clean, dry cloth.
- Polish the tail lights with a specialized car light polish for extra shine.
Regular cleaning not only improves visibility but also extends the life of your tail lights.

Credit: www.youtube.com
Frequently Asked Questions
How Do You Identify A Busted Tail Light?
To identify a busted tail light, look for cracks, broken glass, or unlit bulbs. Check if the light is dim or flickering.
What Tools Are Needed To Fix A Tail Light?
You’ll need a screwdriver, replacement bulbs, and possibly pliers. Ensure you have the correct bulb type for your car.
Can I Fix A Busted Tail Light Myself?
Yes, you can fix it yourself. It’s a simple process involving removing screws, replacing the bulb, and reassembling.
How Much Does It Cost To Fix A Tail Light?
The cost to fix a tail light ranges from $10 to $100. It depends on the vehicle and parts.
Conclusion
Fixing a busted tail light is easier than you think. Follow the steps, gather tools, and ensure safety. This task saves money and time. Plus, you learn a new skill. Regular checks keep your car in top shape. Don’t let a broken tail light stress you.
Stay safe on the road. Happy driving!


