
Christmas lights add magic to your holiday decor. But a cut wire can spoil the fun.
Fixing a cut Christmas light wire is easier than you think. With a few tools and some patience, you can restore your lights to their glowing glory. Whether it’s a simple break or a more complex issue, knowing how to fix it yourself can save you time and money.
This guide will walk you through the steps, ensuring your holiday lights shine bright. Keep reading to learn how to fix a cut Christmas light wire and keep your festive spirit intact. No need to buy a new set; a quick fix can do the trick.
Gathering Necessary Tools
Fixing a cut Christmas light wire can seem daunting. But with the right tools, you can handle it easily. Before you start, gather all the necessary tools and materials. This will make the process smoother and quicker.
Required Tools And Materials
Here are the essential tools and materials you will need:
- Wire cutters
- Electrical tape
- Wire strippers
- Replacement wire
- Heat shrink tubing
- Soldering iron and solder (optional)
Having these tools ready will save you time. You won’t need to stop and search for each item. Ensure they are in good working condition for best results.
Safety Precautions
Safety is crucial when working with electrical wires. Always unplug the lights before starting any repairs. This prevents electric shocks or further damage.
Wear insulated gloves to protect your hands. They provide an extra layer of safety. Work in a well-lit area. This helps you see clearly and avoid mistakes.
Keep a fire extinguisher nearby. It’s better to be safe than sorry. If using a soldering iron, work in a ventilated space. The fumes can be harmful if inhaled.
By following these safety tips, you can fix your Christmas lights safely and efficiently.
Identifying The Problem Area
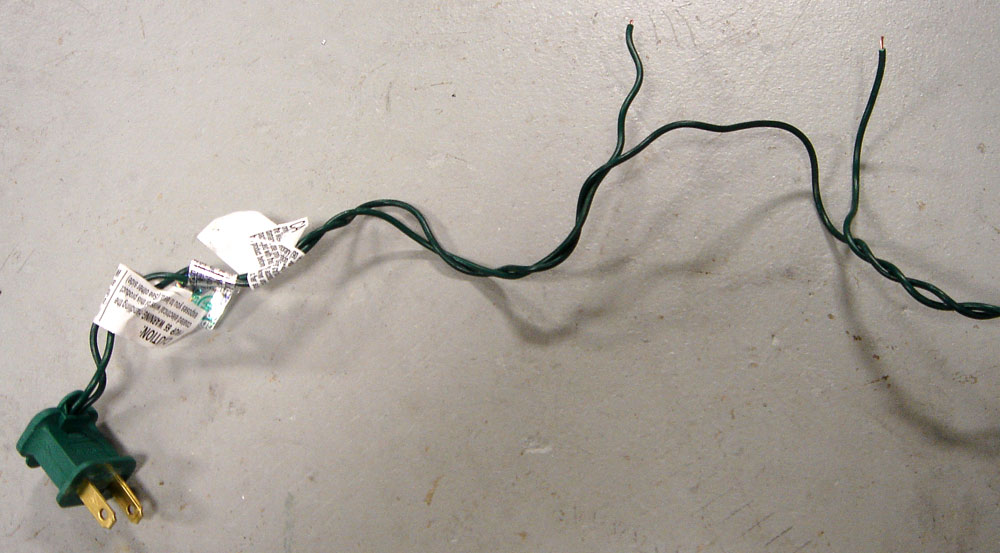
Finding and fixing a cut Christmas light wire can be tricky. Identifying the problem area is key to a successful repair. This section will guide you through the process step-by-step. You will learn how to locate the cut wire and inspect for additional damage.
Locating The Cut Wire
Start by plugging in your Christmas lights. Check which section is not lighting up. This can help narrow down the search area. Unplug the lights before you begin inspecting them closely.
Run your fingers along the wire. Feel for any cuts or nicks. Look for visible signs of damage. These include exposed wires or frayed insulation.
| Step | Action |
|---|---|
| 1 | Plug in the lights |
| 2 | Identify the non-working section |
| 3 | Unplug the lights |
| 4 | Inspect the wire for cuts or nicks |
Inspecting For Additional Damage
After finding the cut wire, inspect the nearby areas. Check for additional damage that might not be immediately visible. Pay attention to any burnt or melted sections. These could indicate a more serious issue.
Use a multimeter to test the continuity of the wire. A break in continuity means there is another cut or fault. Repair all identified issues before plugging the lights back in.
- Inspect nearby areas for hidden damage
- Look for burnt or melted sections
- Use a multimeter to test wire continuity
- Repair all identified issues
Preparing The Wire For Repair
Repairing cut Christmas light wires can seem tricky. But with the right steps, it’s manageable. Preparing the wire for repair is crucial. It ensures a smooth and safe process. Let’s dive into how to get the wire ready.
Stripping The Wire
First, gather your tools. You will need a wire stripper. Carefully remove the outer insulation. Leave about half an inch of exposed wire. Be gentle to avoid cutting the wire strands.
If you don’t have a wire stripper, use a sharp knife. Score around the insulation lightly. Then, pull it off gently. Ensure you don’t damage the inner wires. This step is critical for a strong connection.
Cleaning The Wire Ends
Next, clean the wire ends. This removes any dirt or oxidation. Use a small brush or cloth. Dip it in rubbing alcohol. Gently scrub the exposed wire.
Ensure the wires are shiny and clean. This will help in making a solid connection. Clean wires conduct electricity better. This ensures your lights will work properly.
With these steps, your wire is now ready for repair. Follow each step carefully for the best results.
Splicing The Wire
Fixing a cut Christmas light wire might seem tricky. Splicing the wire is essential to restore its function. Proper splicing ensures the lights work safely. This section will guide you through two methods. Using wire connectors and twisting wires together.
Using Wire Connectors
Wire connectors are easy to use. First, strip about half an inch of insulation from each end. Insert the stripped ends into the connector. Twist the connector until it feels tight. This makes a secure connection. Test the lights to ensure they work.
Twisting Wires Together
Twisting wires together is another method. Strip half an inch of insulation from each end. Twist the exposed wires together tightly. Wrap the twisted section with electrical tape. This prevents short circuits. Check the lights to ensure they work.
Securing The Connection
Securing the connection of your Christmas light wire ensures safety and longevity. After fixing the cut, you need to secure the connection. This prevents future issues and maintains the electrical flow. Here are two effective methods to accomplish this.
Applying Electrical Tape
Electrical tape is a simple and effective way to secure the connection. Follow these steps:
- First, align the cut wires end to end.
- Next, wrap the electrical tape around the wires tightly.
- Ensure the tape covers the exposed wire completely.
- Wrap the tape multiple times for added security.
Electrical tape insulates and protects the connection from moisture.
Using Heat Shrink Tubing
Heat shrink tubing offers a more durable solution. Here’s how you can use it:
- First, slide a piece of heat shrink tubing over one of the wires before connecting them.
- Align the cut wires and twist them together.
- Move the tubing over the connected wires.
- Use a heat gun or hair dryer to shrink the tubing.
Heat shrink tubing forms a tight seal, providing excellent protection.

Credit: www.reddit.com
Testing The Repaired Lights
Testing the repaired Christmas lights ensures the cut wire is fixed correctly. Plug in the lights to see if they work. If they light up, the repair was successful.
Once you’ve fixed the cut Christmas light wire, the next step is testing the repaired lights. This ensures that all your hard work has paid off and your lights will shine brightly.Plugging In The Lights
First, find an outlet close to where you plan to use the lights. Carefully plug in the light string. Ensure that you handle the plug with dry hands to avoid any electrical hazards. Once plugged in, take a step back and observe the lights.Checking For Proper Function
Look at the entire length of the light string. Each bulb should be lit and glowing steadily. If any section remains dark, double-check the repaired area. Sometimes, a loose connection can cause issues. Gently wiggle the wire near the fixed spot. If the lights flicker, tighten the connection.These steps help confirm that your repair was successful. Enjoy the bright and festive glow! “`Maintaining Your Christmas Lights
Maintaining your Christmas lights is crucial to ensure they shine bright year after year. Proper care and storage can extend their lifespan. You can avoid frustration by following simple steps. This guide will help you keep your festive lights in top condition.
Storing Lights Safely
After the holiday season, always store your lights properly. Avoid tangling by wrapping them around a piece of cardboard. This keeps them organized and easy to unravel next year. Store your lights in a cool, dry place. Moisture can damage the wires and bulbs. Use a plastic container to protect your lights from dust and pests.
Regular Maintenance Tips
Check your lights before hanging them each year. Look for frayed wires and broken bulbs. Replace any damaged parts immediately. This prevents short circuits and potential fires. Clean your lights with a soft cloth to remove dust. Dust can reduce their brightness. Never use water or harsh chemicals. They can damage the wiring.
Turn off your lights when not in use. This saves energy and reduces wear and tear. Avoid overloading your electrical outlets. Too many lights on one socket can cause overheating. Use a power strip with a circuit breaker for safety.

Credit: www.reddit.com
Credit: www.reddit.com
Frequently Asked Questions
How To Fix A Cut Christmas Light Wire?
First, unplug the lights. Strip the insulation off the cut ends. Twist the wires together. Use electrical tape to secure them.
Can You Repair Christmas Light Wires?
Yes, you can repair Christmas light wires. Cut out the damaged section. Strip the ends. Twist together and tape.
What Tools Are Needed To Fix Christmas Lights?
You’ll need wire cutters, wire strippers, and electrical tape. Make sure to have a safe workspace.
Is It Safe To Fix Christmas Light Wires?
Yes, if done correctly. Ensure the lights are unplugged. Use proper tools. Follow safety guidelines.
Conclusion
Fixing cut Christmas light wires can be simple and safe. Follow the steps carefully to ensure your lights shine brightly again. Remember, patience is key. Take your time to avoid mistakes. A little effort can bring back the holiday magic.
Enjoy your beautifully lit home this festive season. Happy holidays!


