A malfunctioning brake light switch can be more than just an annoyance. It can be a safety hazard.
Fixing it yourself is easier than you might think. The brake light switch is a small but vital component in your vehicle. It activates the brake lights when you press the brake pedal. When it fails, your brake lights may not work, making it dangerous for you and other drivers.
In this guide, we’ll walk you through the steps to fix your brake light switch. We’ll cover the tools you need, the process to follow, and tips to ensure everything works correctly. Let’s get started on making your car safe again.

Credit: www.wikihow.com
Tools And Materials
Fixing the brake light switch might seem daunting. With the right tools and materials, the task becomes manageable. This section outlines the essential tools and required materials for the job.
Essential Tools
You will need several tools to fix the brake light switch. The first tool is a screwdriver set. Different screws may require different screwdrivers. A flashlight is also necessary. It helps you see in dark areas under the dashboard. You will need a wrench set too. This helps in loosening and tightening bolts. Lastly, a multimeter is crucial. It helps in testing electrical connections.
Required Materials
Prepare a few materials before starting the job. You will need a new brake light switch. This is the main component you will replace. Some electrical tape is also handy. It helps in securing any loose wires. Have some wire connectors ready. These are useful if you need to replace any wiring. Lastly, ensure you have a user manual for your car. It provides specific instructions and diagrams.
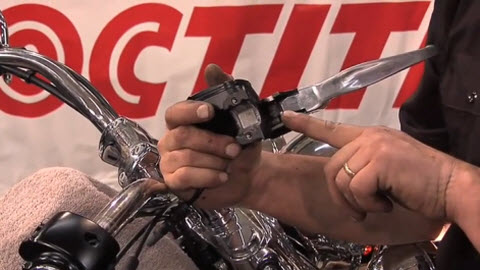
Credit: www.fixmyhog.com
Safety Precautions
Ensuring your safety while fixing the brake light switch is crucial. You are dealing with electrical components. Proper precautions prevent accidents and injuries. Follow these steps for a safe repair process.
Disconnecting The Battery
Always disconnect the battery before starting. This prevents electrical shocks. Use a wrench to loosen the negative terminal. Remove the cable and secure it away from the battery. This step stops any electrical flow.
Working In A Safe Environment
Choose a well-lit area for the repair. Ensure the car is on a flat surface. Use wheel chocks to prevent the car from moving. Wear protective gear such as gloves and safety glasses. Keep a fire extinguisher nearby. Safety first!
Locating The Brake Light Switch
Finding the brake light switch is the first step in fixing it. This switch is crucial as it activates the brake lights when you press the brake pedal. Knowing where to look can save time and effort. Below are steps to help you locate the brake light switch efficiently.
Consulting The Manual
Your vehicle’s manual is a valuable resource. It contains specific information about your car model. To find the brake light switch, refer to the section on electrical components. Manuals often have diagrams that show the exact location of the switch.
If you don’t have a physical copy, you can download the manual online. Many manufacturers provide digital versions on their websites. Having the manual handy will make the process easier.
Identifying The Switch
After consulting the manual, you will have a general idea of where the switch is located. Usually, it is under the dashboard near the top of the brake pedal. To identify the brake light switch, follow these steps:
- Sit in the driver’s seat and look under the dashboard.
- Locate the brake pedal and follow it up to where it connects.
- The brake light switch is typically a small, rectangular component with wires attached.
Sometimes, the switch is covered by a panel. You may need to remove the panel to access it. Use a screwdriver to remove any screws holding the panel in place.
Once you identify the switch, you can proceed with testing or replacing it.
Removing The Old Switch
Removing the old brake light switch is a crucial step in fixing your car’s brake lights. A faulty brake light switch can cause a lot of problems. It can make your brake lights stay on or not work at all. Follow these simple steps to remove the old switch.
Accessing The Switch
First, locate the brake light switch. It is usually near the top of the brake pedal. You might need a flashlight to see it clearly. Move the driver’s seat back to give yourself more room. Remove any panels or covers that block your access to the switch. This will make it easier to reach.
Disconnecting Wires
Next, find the wires connected to the brake light switch. These wires send signals to your brake lights. Carefully disconnect the wires. You may need to press a small clip to release them. Avoid pulling on the wires too hard. This can damage them.
Extracting The Switch
Now, you need to remove the switch itself. The switch is usually held in place by a nut or clip. Use a wrench or pliers to remove the nut or clip. Once it’s loose, you can pull the switch out. Take note of its position. This will help you install the new switch correctly.
Installing The New Switch
Replacing a brake light switch can seem challenging, but it is doable with the right steps. Installing the new switch involves a few key actions. Let’s walk through the process together.
Positioning The Switch
First, locate the bracket where the old switch was mounted. Carefully slide the new switch into the bracket. Ensure it aligns perfectly with the brake pedal. A misaligned switch can cause malfunction.
Reconnecting Wires
Identify the wires you disconnected from the old switch. Connect these wires to the new switch. Ensure each wire connects to the correct terminal. A wrong connection can prevent the brake lights from working.
Securing The Switch
Once the wires are connected, secure the switch in place. Use the mounting nuts or screws that came with your new switch. Tighten them enough to hold the switch firmly but do not overtighten.
Test the brake lights after installation. Press the brake pedal and ensure the lights illuminate. If they do, your new switch is installed correctly.
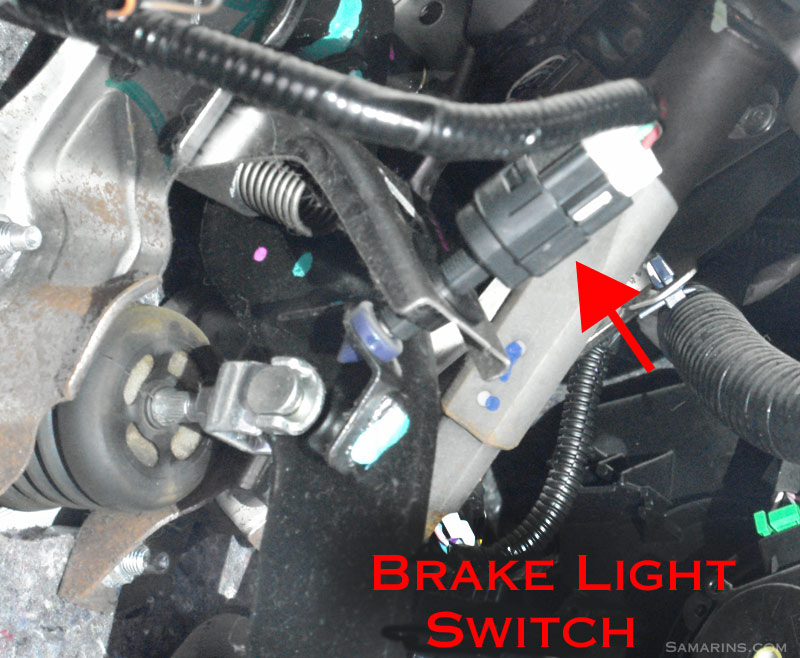
Credit: www.samarins.com
Testing The New Switch
After installing the new brake light switch, it’s vital to test it. This ensures the brake lights function properly. Follow these steps to make sure everything works as it should.
Reconnecting The Battery
First, reconnect the car battery. This step is essential. Without reconnecting, you can’t test the brake lights. Locate the battery terminals. Attach the positive terminal first. Then, connect the negative terminal. Ensure the connections are tight. Loose connections can cause problems. This step is now complete.
Checking Brake Lights
Next, check the brake lights. Sit in the driver’s seat. Press the brake pedal. Have someone observe the brake lights. They should light up immediately. If they don’t, recheck your work. Ensure the switch is installed correctly. Double-check the connections. Sometimes, a small adjustment is needed. Once the lights work, you know the new switch is functioning.
Troubleshooting Tips
Having trouble with your brake light switch? Here are some troubleshooting tips. These steps can help you identify and fix common issues. Keep reading to learn more.
Rechecking Connections
First, inspect the brake light switch connections. Ensure all wires are connected securely. Loose wires can cause malfunction. Gently tug each wire to check. If a wire comes loose, reconnect it. Tighten any loose connections. This simple step can solve many issues.
Consulting A Professional
If rechecking connections doesn’t work, seek professional help. A mechanic has the tools to diagnose the problem. They can check the brake light switch thoroughly. Professionals can identify issues you might miss. Trust their expertise for a safe and functional brake light.
Maintenance Tips
Maintaining your vehicle’s brake light switch is essential for safety. Regular checks can prevent unexpected issues. Below are some key maintenance tips to keep your brake light switch in good condition.
Regular Inspections
Inspect the brake light switch at least once a month. Lift the brake pedal and look for any signs of damage. Ensure the switch operates smoothly. Test the brake lights to confirm they’re working. If the lights flicker, there might be an issue.
Signs Of Wear And Tear
Watch for signs of wear and tear. If the brake lights stay on, the switch could be stuck. If the lights don’t turn on, the switch might be broken. Listen for unusual sounds when pressing the brake pedal. Strange noises could indicate a problem. Address any issues immediately to ensure safety.
Frequently Asked Questions
What Is A Brake Light Switch?
A brake light switch is a small electrical device. It activates the brake lights when you press the brake pedal.
How Do I Know If My Brake Light Switch Is Bad?
If your brake lights don’t turn on, the switch might be bad. Another sign is if your brake lights stay on.
Can I Fix The Brake Light Switch Myself?
Yes, you can fix it yourself with some basic tools. Follow the instructions in your vehicle’s manual for guidance.
What Tools Are Needed To Fix A Brake Light Switch?
You will need a screwdriver and possibly a wrench. Some vehicles might also require a flashlight for better visibility.
Conclusion
Fixing the brake light switch can seem tricky, but it’s doable. Follow the steps carefully. Gather your tools first. Check the switch’s position and connections. Replace if necessary. Testing ensures safety. A functional brake light switch keeps you safe on the road.
Don’t delay repairs. Regular maintenance prevents future issues. This guide simplifies the process. Now, you’re ready to tackle the task. Drive safely and confidently.


