Seeing the “Check Fuel Cap” light on your dashboard can be annoying. This light usually means the fuel cap is loose or damaged.
Understanding why this happens is important. A loose fuel cap can lead to fuel evaporation, which harms the environment. It can also affect your car’s performance. Fixing this issue is usually simple and can save you from bigger problems later.
In this blog post, we will guide you on how to fix the “Check Fuel Cap” light. We will cover the common reasons for this issue and the steps to resolve it. By the end, you’ll know how to handle this problem easily and effectively. Let’s get started!
Common Reasons For Check Fuel Cap Light
The Check Fuel Cap Light can be a source of frustration for many car owners. It alerts you to potential issues with your fuel cap, which can affect your vehicle’s performance. Understanding the common reasons for this light can help you fix the problem quickly and avoid unnecessary trips to the mechanic.
Loose Fuel Cap
A loose fuel cap is one of the most common reasons for the Check Fuel Cap Light. If the cap is not tightened properly, it can cause the light to come on. This happens because the fuel system detects a leak, which can reduce fuel efficiency.
To fix this, ensure the fuel cap is turned until it clicks. This indicates it is securely tightened. Check it after every fill-up to make sure it hasn’t come loose. This simple step can often solve the problem and turn off the warning light.
Damaged Fuel Cap
A damaged fuel cap can also trigger the Check Fuel Cap Light. Over time, the cap can crack or the seal can wear out. This allows fuel vapors to escape, causing the light to activate.
Inspect the fuel cap for any visible damage. Look for cracks or worn-out seals. If you find any, replace the cap with a new one that fits your vehicle model. This will restore the proper seal and should turn off the warning light.
Credit: www.bobhowardbuickgmc.com
Tools You Will Need
Fixing the check fuel cap light is an easy task. You just need the right tools. In this section, we’ll list the essential tools. These will help you get the job done quickly and safely.
Basic Tools
- Gloves – Protect your hands from dirt and chemicals.
- Flashlight – See clearly in low-light conditions.
- Rag or Cloth – Clean the fuel cap and surrounding area.
Replacement Fuel Cap
Sometimes, the fuel cap itself is faulty. In this case, you will need a replacement. Ensure it’s the correct type for your car. Here’s what to look for:
| Car Make | Fuel Cap Model |
|---|---|
| Toyota | OEM 77300-33070 |
| Honda | OEM 17670-T3W-A01 |
| Ford | Motorcraft FC-1069 |
Inspecting The Fuel Cap
When the check fuel cap light appears, it usually means there’s an issue with the fuel cap. A loose or damaged fuel cap can cause this warning. Inspecting the fuel cap is the first step to fixing the issue. Start with a visual inspection and then check for cracks. This process is simple and can be done by anyone.
Visual Inspection
Begin by locating the fuel cap on your vehicle. Remove the cap and examine it closely. Ensure the cap is not loose. A loose cap can trigger the warning light. Tighten the cap securely and see if the light turns off. If the light remains, further inspection is needed.
Checking For Cracks
Inspect the fuel cap for any cracks. Cracks can allow air to enter the fuel system. Air in the fuel system can cause the warning light. If you find any cracks, replace the fuel cap immediately. A new fuel cap is inexpensive and easy to install.
If no cracks are visible, check the rubber seal. The seal should be intact and flexible. A damaged seal can also trigger the check fuel cap light. Replace the cap if the seal is damaged.
Cleaning The Fuel Cap
Experiencing a “Check Fuel Cap” light can be frustrating. Often, the issue lies with a dirty or clogged fuel cap. Cleaning the fuel cap is a simple process that can resolve this warning light. Follow these steps to ensure your fuel cap is clean and functioning properly.
Using A Cleaning Solution
First, get a mild cleaning solution. You can use soapy water or a mixture of water and vinegar.
- Remove the fuel cap from your vehicle.
- Soak a cloth in the cleaning solution.
- Wipe the inside and outside of the cap thoroughly.
Ensure you clean all the grooves and threads. Dirt and debris often collect in these areas.
Drying The Cap
After cleaning, it is important to dry the fuel cap completely.
- Use a dry cloth to wipe off excess moisture.
- Allow the cap to air dry for a few minutes.
Make sure the cap is completely dry before reattaching it to your vehicle. A wet fuel cap can cause further issues.
| Step | Details |
|---|---|
| Remove | Take the fuel cap off the vehicle. |
| Clean | Use a cleaning solution to wipe the cap. |
| Dry | Ensure the cap is completely dry before use. |
Reinstalling The Fuel Cap
Reinstalling the fuel cap is a simple yet crucial task. It can often resolve the “Check Fuel Cap” light issue. This section will guide you through the proper steps to ensure your fuel cap is correctly reinstalled.
Proper Tightening
First, remove the fuel cap completely. Inspect it for any damage. A damaged cap won’t seal properly. Next, place the cap back on the fuel tank opening.
Turn the cap clockwise until you hear a click. This click ensures the cap is tight enough. If you do not hear a click, the cap is not tight. Try again until you hear the click.
Ensuring A Proper Seal
After tightening, check the seal around the cap. The seal must be clean and free from debris. Dirt or grime can prevent a proper seal. Wipe the area with a clean cloth if needed.
Press down on the cap to ensure it is seated properly. A good seal prevents fuel vapors from escaping. This helps in keeping the “Check Fuel Cap” light off.
If the light remains on, there might be another issue. Consider seeking professional help. Ensuring a tight and clean fuel cap is an easy first step to fix the light.
Credit: www.reddit.com
Resetting The Check Fuel Cap Light
Resetting the Check Fuel Cap Light can be simple. You can use either a manual method or an OBD-II scanner. Both methods are effective and easy to follow. This guide will help you understand each step clearly.
Manual Reset
Sometimes, the Check Fuel Cap Light can be reset manually. Follow these steps:
- Turn off your vehicle and remove the keys.
- Open the fuel cap and check for any debris or damage.
- Securely tighten the fuel cap until you hear a click.
- Start your vehicle and see if the light turns off.
If the light stays on, drive for a few miles. The light may reset itself after some time.
Using An Obd-ii Scanner
An OBD-II scanner can be very helpful. Here’s how to use it:
- Locate the OBD-II port under your dashboard.
- Connect the scanner to the port.
- Turn on your vehicle and the scanner.
- Follow the scanner instructions to read the error codes.
- Clear the error codes using the scanner’s reset function.
This should reset the Check Fuel Cap Light. If the light remains on, the fuel cap might need replacing. Always refer to your vehicle’s manual for specific details.
When To Replace The Fuel Cap
A worn-out or damaged fuel cap can trigger the “Check Fuel Cap” light. Replace the fuel cap if it is cracked or doesn’t seal properly.
Replacing a fuel cap might seem minor. Yet, it is important for your car’s health. A faulty fuel cap can lead to many issues. This includes the “Check Fuel Cap” light coming on. Knowing when to replace the fuel cap helps prevent bigger problems.Signs Of Wear And Tear
Fuel caps can wear out over time. Look for cracks or splits in the cap. The rubber seal can also degrade. If you see these signs, it is time to replace the fuel cap. Another sign is a loose fit. If the cap does not tighten properly, it may be worn out.Finding A Suitable Replacement
Finding the right replacement is easy. First, check your car’s manual. It will list the correct fuel cap type. Many auto parts stores can help you find a match. Online stores also offer a wide range of options. Make sure the new cap fits snugly. This will ensure a proper seal and keep your car running smoothly. “`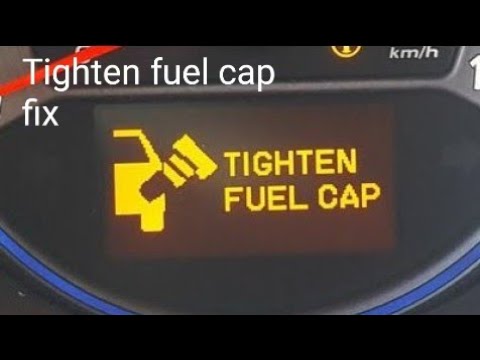
Credit: www.youtube.com
Preventing Future Issues
Fixing the “Check Fuel Cap” light is only part of the solution. Preventing future issues is key to maintaining your vehicle’s performance and avoiding unnecessary trips to the mechanic. Let’s explore some essential practices to keep this problem at bay.
Regular Maintenance
Regular maintenance is the first step in preventing fuel cap issues. Schedule routine check-ups to ensure everything is in good condition. A well-maintained vehicle runs efficiently and reduces the risk of warning lights.
- Check the fuel cap’s condition during oil changes.
- Inspect for any cracks or wear on the cap.
- Replace the cap if it shows signs of damage.
Keeping a maintenance log helps track the condition of your fuel cap and other vehicle parts.
Proper Fuel Cap Handling
Handling the fuel cap properly can prevent many issues. Always make sure the cap is tightened correctly after refueling. A loose cap can trigger the warning light.
- Turn the cap until you hear a click.
- Ensure the cap is seated properly.
- Never over-tighten the cap.
Proper handling extends the lifespan of your fuel cap and ensures a tight seal.
Frequently Asked Questions
What Does The Check Fuel Cap Light Mean?
The check fuel cap light indicates that the fuel cap is loose or not properly sealed. This can lead to fuel vapors escaping, affecting your vehicle’s emissions system.
How Do I Fix The Check Fuel Cap Light?
To fix the check fuel cap light, first ensure the cap is securely tightened. If the light remains on, inspect the cap for damage and replace if necessary.
Can A Loose Fuel Cap Cause Other Problems?
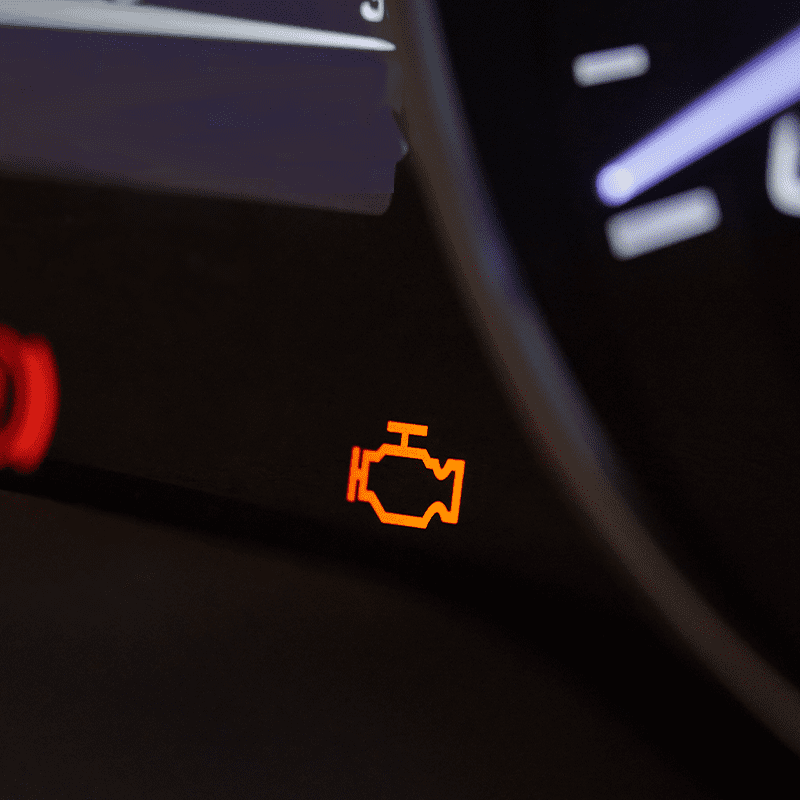
Yes, a loose fuel cap can cause decreased fuel efficiency and increased emissions. It may also trigger the check engine light.
How Long Does It Take For The Light To Reset?
After tightening or replacing the fuel cap, the light should reset within a few driving cycles. This may take a day or two.
Conclusion
Fixing the check fuel cap light can be simple. First, ensure the cap is tight. Second, inspect for damage. Third, replace if needed. Addressing the issue promptly prevents fuel loss and emissions problems. Regular checks keep your vehicle running efficiently.
Now you’re ready to fix it yourself. Safe driving!


